Showing posts with label Home Decor. Show all posts

Sunday, 3 March 2013

Tour around my Flat: The Bedroom/ Workspace

Finally, I have a reason to blog again! I have been so involved in re-organising my room the way I want it; it may not be "mine", but if I'm paying rent, I may as well have it more homely and make me feel more comfortable! I'm also a big believer in Feng Shui, so if it's too awkward, then I can't settle myself.

Anyway, Here is the bedroom! :)

 My aim for this room was to make it as cute as possible, and there's no better way than a cute floral duvet cover from Primark.

I also got the type writer on sale for £2, and it's pretty comfy! I also hand-made all the other cushions- the patchwork one on the right was made through recycling scrap fabric, whilst the vibrant coloured cushions were made from a length of fabric that I made in my first year of Uni that I really wasn't going to use!


I love to have inspiration around me. :)


Around 80% of my jewellery are handmade, so here is my collection! A lot of them are my own designs, but I wear a lot of other independent designers, like Violet Bella, Lucky Kunst, and Red Mutha. A great tip- if you have a lot of necklaces but haven't got a good display for them, use these Ikea racks that you can just hang over your door- very minimal effort.


Since this photo was taken, I did change this table for a slightly larger one; I want to be able to sew on it as well so I need as much room as possible, without taking so much space in the room!


I fixed up this shelf from Ikea! It took my 6 hours of pain, and I broke my screwdriver, which meant a lot of it was done with a nail clipper... yikes!  But anyway, here is where I keep all the jewellery I make, and it's really great that everything is now an arm's reach away from my desk. 

Overall; my room is small, but I could fit everything I need to in here, cos of the in-built wardrobe, and just the fact that everything is organised properly. I also love the way I've arranged the place looks super cute and cosy.

Will have more pictures of the rest of the place soon!


Friday, 18 January 2013

DIY Friday: Fabric Covered Canvas

 I made a fabric canvas, which is destined to jazz up any space! I have always wanted decor that was stylish and one of a kind, and now this is possible!


What you need:
- some lovely fabric
- canvas (I got mine from a lovely shop called Tiger)
- scissors
- glue gun (super glue will do!) 
- marker


  1. With your marker, draw around the edges of the canvas, leaving an inch wide gap to stick around the edges.

2. Cut around the outside of the marking.


3. Use your glue gun, apply glue around the top edges of the canvas. It's best to do it one edge at a time, so that it's easier to stretch around the fabric properly.


4. Glue again around the back of the canvas.

5. Fold the fabric on itself whilst gluing, just so that it's a bit neater!

This is how it should look like at the back!


I hope this was helpful, lovelies!


Friday, 6 April 2012

DIY Fridays: Triangle Painting

Hello everyone, and happy Good Friday! :)

I was watching this programme on Damien Hurst and his kind of artistic journey, and the works that he made throughout, and I must say, I was extremely excited and motivated to do work, I actually went to Croydon to buy some paint and a canvas and started painting. Painting and pattern making are my biggest passions creatively, and this is something that has come so naturally to me. I hope you enjoy this DIY <3.


Here is what you need:


  • Set square/Ruler
  • Acrylic paint (you can choose as many colours as you like)
  • Canvas
  • Pencil
  • Flat edged and a thin rounded edge paintbrush
  • Paint palette/ card
  • Water Jar


1) Draw the outline of the triangle using the middle of the set square. If you are using a ruler, you could still do it, but make sure the measurements are accurate and the same throughout the canvas.


- you can rotate the pattern or keep it the same uniform way. I just wanted to be different ;)

2) Using your flat edged paintbrush, paint in your shape, avoiding the outline of your triangle.

3) With your round edge paintbrush, go over the edges. (I hope you have a more steady hand than me!)


4) using the other end of your paintbrush, dab in the colour in between the triangles.

You can do this for a few or as many sections as you like!

Ta-dah! This is what your painting should look like ;)


I hope you enjoyed this DIY :). Tune in next Friday for another DIY!

Katherine xo

Saturday, 14 January 2012

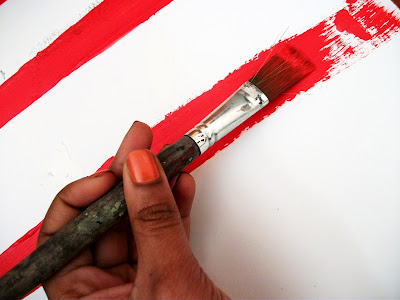
DIY Post- Coloured Stripe Painting


I thought I'd share a very simple DIY blog post, minimal effort required for once! It doesn't really go well in my room, but I'm just placing it here for the visualisation! :)

Here is what you will need:


- Paint brushes
- Acrylic paint
- A3 card
- Paint palette
- Jam jar for water

Step 1) Choose 5 paint brushes, varying in size.

Step 2) Paint on your first colour horizontally. Don't worry about it being straight or anything, it's supposed to be freespirited! :)

Step 3) Put on the 2nd Colour. If certain  areas come out a bit bumpy, then just smooth it out with the paint brush. Don't worry if the colours overlap. Keep doing it with as much colours as you want.


Tada! Told you it was really simple! :) Maybe try it for yourself and see where it gets you? Maybe you don't have to do it in as much crazy colours as me, but it still would look good! 

Katherine xo

Tuesday, 3 January 2012

Studio Decor Inspiration.

I am in love with bohemian styles, even within my designs... and since I am in the redecorating/re-organising mood, it's nice to have some ideas as to characterize my studio space so it would entice me to stay up there more and sew some cool things for my shop.


I cannot wait to get stuck into all this, although it would be hard because my studio is in the attic, it is sooo awkwardly built, BUT I do love a challenge! I'm excited as to how it would turn out! :)

Katherine xo

Sunday, 1 January 2012

Happy 2012- Bedroom Makeovers Inspiration.

Happy new year loveliessssss!

For the past 3 years that I have lived in my new house, I haven't yet felt fully settled in, even to the point where I absolutely trashed my room after like a month of moving in, which my mum wasn't happy about at all- whoops! I have since wallpapered over all the vandalism I put all over the walls, but I feel like it's not really me.


I also have had some really bad memories in my time here as well, and since it's the new year, I think it's time for a fresh start in everything in my life, starting with my bedroom, because this has been a long time coming.

I have developed a bohemian style, which I love, so here are some inspirations that I will be designing my room from: