

I thought this would be a wicked thing to rock, especially if you're bored of your wardrobe right now, its the perfect way to jazz it up!
What you will need:

- Carrier Bag
- T Shirt
- Bleach
- Gloves
- Old Paintbrush
- Pot/Palette for the bleach
Also, make sure you're in a well ventilated area- no one likes to be around bleach!

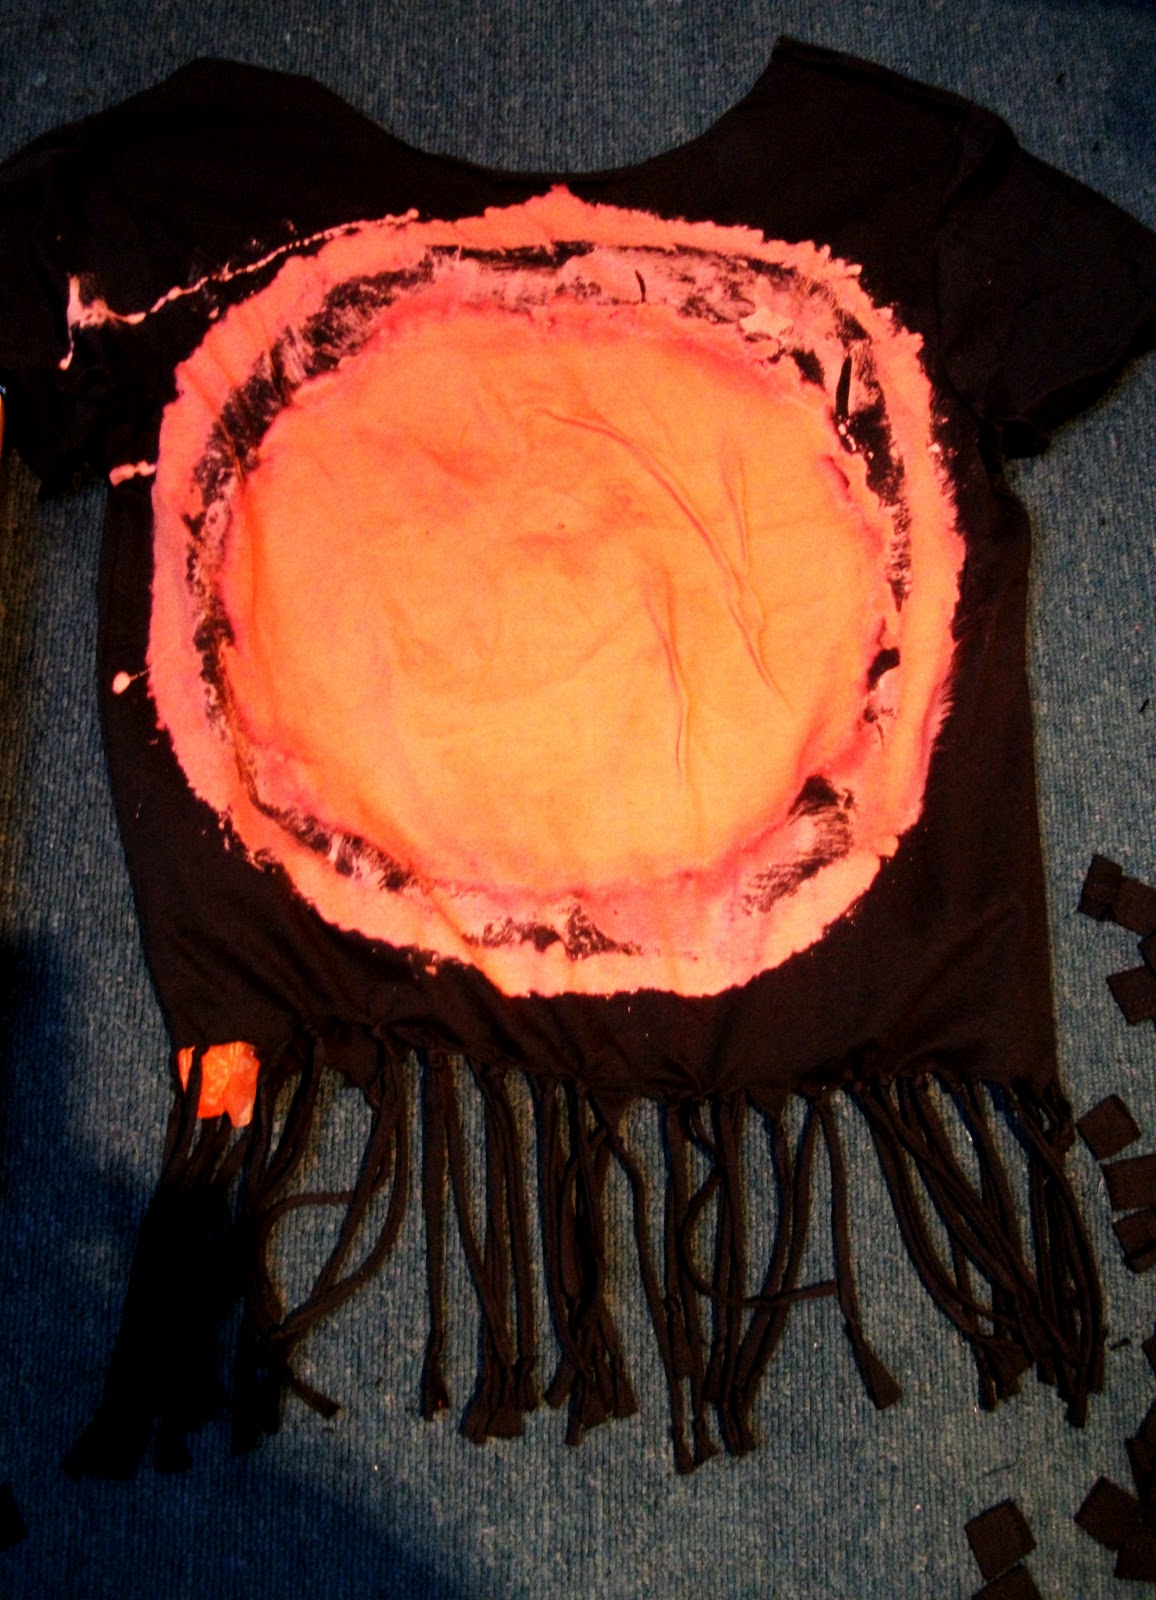
Step One: Put the carrier bag in between the front and the back of the t shirt to prevent seeping. Pour a small amount of bleach into the pot/palette and dab it around in any shape that you want, but I'm doing a circle, because it's easy :)

Step Two: Fill in the centre with the bleach and keep dabbing at it until the t shirt starts to change colour.

Step Three: If you want to, you can go around it again in an outline, but it would look just as good without it.

Step Four: Cut around the neck area.

At this point, you can wash it, because I know the smell of the bleach is really overpowering. I'd say handwash it in a bucket or sink, and not in the washing machine, to avoid contamination.

Step Five: Cut into the t shirt, about 1cm apart. You can go as high up the T Shirt as you wish.

Step Six: Knot the strip, just cos it looks good, and that it doesn't come apart when you wash it.

Step Seven: Knot the ends as well, cos it looks really cool.
Katherine xo
No comments:
Post a Comment